
How To Make A Camping Tent Waterproof With DWR & Sealant
This post contains affiliate links. As an Amazon Associate, we earn from qualifying purchases.
To make a camping tent waterproof, you must match three things: the fabric type (silicone-coated nylon vs. polyurethane-coated polyester), the correct seam sealant for that fabric, and a fresh application of Durable Water Repellent (DWR) spray to the rainfly. A 2000mm hydrostatic head rating is standard for three-season tents, but upgrading to a 3000mm-rated treatment is necessary for prolonged heavy rain.
Most people get this wrong because they treat all tents the same. They buy a generic waterproofing spray, slather it on, and wonder why water still seeps through the stitching two weekends later. The fabric type dictates the chemistry, and using the wrong sealant guarantees failure.
This guide walks through identifying your tent’s coating, choosing the right products, and executing a seven-step process that actually works. We’ll cover why a bathtub floor design is non-negotiable, how to spot condensation versus a real leak, and when to pay for professional seam re-taping instead of risking your tent with a household iron.
Key Takeaways
- Using silicone seam sealer on a polyurethane-coated tent (or vice versa) creates a non-stick layer that peels off in the first drizzle. The chemistry must match.
- A bathtub floor, where the waterproof material curves up the walls, is your primary defense against ground water. If your tent lacks this, no amount of seam sealing will keep you dry in a puddle.
- Condensation inside your tent mimics a leak. Before re-waterproofing, open all vents and zippers on a dry night. If the moisture disappears, it was condensation, not a failure.
- For markets with exceptionally heavy or prolonged rainfall, or for four-season use, upgrade your treatment to fabrics rated at 3000mm HH or higher. The standard 2000mm HH for three-season tents can fail under sustained pressure.
- Never pack away a tent that is even slightly damp. Mildew spores germinate in under 24 hours inside a stuff sack, and the resulting stains and smell are permanent.
The One Thing That Decides Your Sealant Choice
Your tent’s fabric coating determines everything. Get this wrong and your waterproofing job fails on the first night out.
Tent fabrics are coated with one of two substances: silicone or polyurethane (PU). Silicone-coated nylon feels slicker and is often used in higher-end, lightweight tents. Polyurethane-coated polyester or nylon is more common and feels slightly tackier to the touch. The coatings repel water, but the needle holes from stitching do not. That’s why you seal seams.
Gear Aid Seam Grip SIL Silicone Tent Sealant is formulated for silicone nylon tents. McNett Seam Grip is designed for PU-coated polyester or nylon tents. They are not interchangeable.
Applying silicone sealant to a PU coating is like spreading oil on Teflon, it won’t bond. It will bead up, peel, and let water straight through the needle holes. The reverse is also true. PU sealant on silicone fabric just sits on top as a brittle film.
Check your tent’s manual or care label. If it’s lost, do a spot test on an inconspicuous seam. Apply a tiny dot of the suspected correct sealant, let it cure for 24 hours, and try to peel it off with a fingernail. If it lifts cleanly, you guessed wrong.
TL;DR: Identify your fabric coating first. Silicone needs silicone sealant; PU needs PU sealant. A wrong guess wastes a weekend and a bottle of sealant.
Is It a Leak or Just Condensation?
You wake up to droplets on the tent wall. Your first instinct is to reach for the seam sealer. Stop.
Condensation inside a tent mimics a leak perfectly. It collects on the coldest surface, usually the fly or the wall, and drips. The difference is the source. A leak brings water from outside. Condensation is your own breath and body moisture hitting a cold surface.
Common mistake: Sealing a tent for condensation, you add weight and reduce breathability, making the problem worse. The real fix is opening vents to increase airflow.
Here’s the test. On a dry, clear night, pitch your tent in the backyard. Open all the vents and mesh panels. Sleep inside. If the interior is dry in the morning, your “leak” was condensation. If water is still beading inside, you have a waterproofing failure.
This matters because sealing a tent that suffers from condensation reduces its breathability. The next time you use it, condensation builds faster. You end up in a wetter tent, convinced the sealant failed, and you seal it again. The cycle continues until the fabric is a sticky, heavy mess.
The Bathtub Floor Design vs. Seam Sealing
All the seam sealing in the world won’t save a tent with a poor floor design. The most critical waterproofing feature is one you can’t add later: the bathtub floor.
A bathtub floor is a single, continuous piece of waterproof material that extends several inches up the lower walls. This design physically lifts the floor-to-wall seam off the ground, moving it away from puddles and runoff. Water has to climb that vertical wall before it can reach the stitching.
Tents without this design have a seam right where the floor meets the wall, often sitting directly on the ground. Even a perfect seal on that seam is sitting in a puddle during a downpour. Hydrostatic pressure will eventually push moisture through.
| Floor Design | How It Protects | Risk If Compromised |
|---|---|---|
| Bathtub Floor | Lifts critical seam 4–6 inches off ground | None — seam is away from ground water |
| Flat/Sewn Floor | Seam sits directly on ground | Water pools at seam; leaks within 30 mins of heavy rain |
If your tent lacks a bathtub floor, your best defense is a high-quality, waterproof groundsheet or footprint that extends a few inches past the tent walls. It won’t fix the design flaw, but it redirects water.
When shopping for a new shelter, prioritize this feature. Many affordable tents for heavy rain and storm-resistant tent models use a bathtub design as a baseline.
Silicone vs. PU: The Sealant Showdown
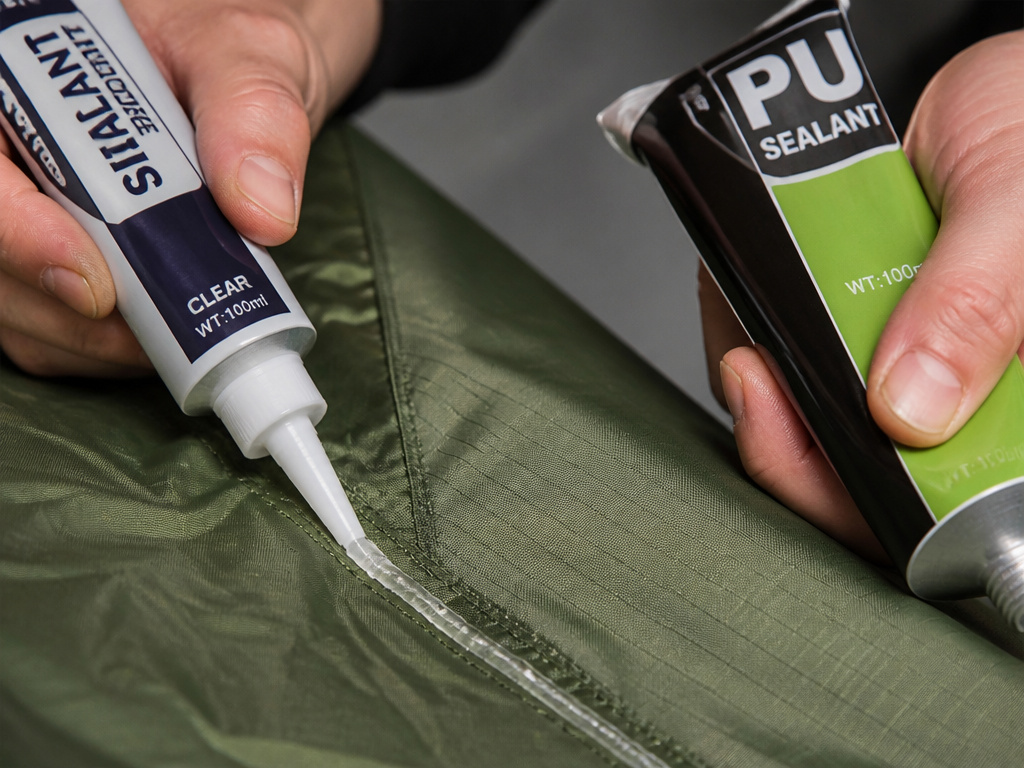
You’ve identified your coating. Now you need the right product. The market splits cleanly in two.
Silicone sealants, like Gear Aid Seam Grip SIL, remain flexible in extreme cold and won’t degrade under UV exposure. They are the choice for high-end, lightweight tarp tents and mountaineering shelters. The downside is that once applied, you cannot later apply a PU coating or DWR spray over the top, silicone rejects them. Future repairs must also be silicone.
PU sealants, like McNett Seam Grip, are tougher and more abrasion-resistant. They are the standard for family car-camping tents, durable canvas shelters, and most stand-up tents. You can apply DWR over a cured PU seam seal. However, PU can become brittle in freezing temperatures and may crack if the tent is folded while cold.
I used McNett Seam Grip on a three-season polyester tent and it held for two years of hard use. Then I left the tent packed in a cold car trunk over a Vermont winter. The next spring, the sealed seams had fine hairline cracks at every fold. I had to strip and redo them all.
Your climate dictates the better choice. For winter camping or four-season canvas tents, silicone’s flexibility wins. For three-season use where abrasion is a bigger threat than cold, PU is the workhorse.
The 2000mm vs. 3000mm HH Rating Upgrade
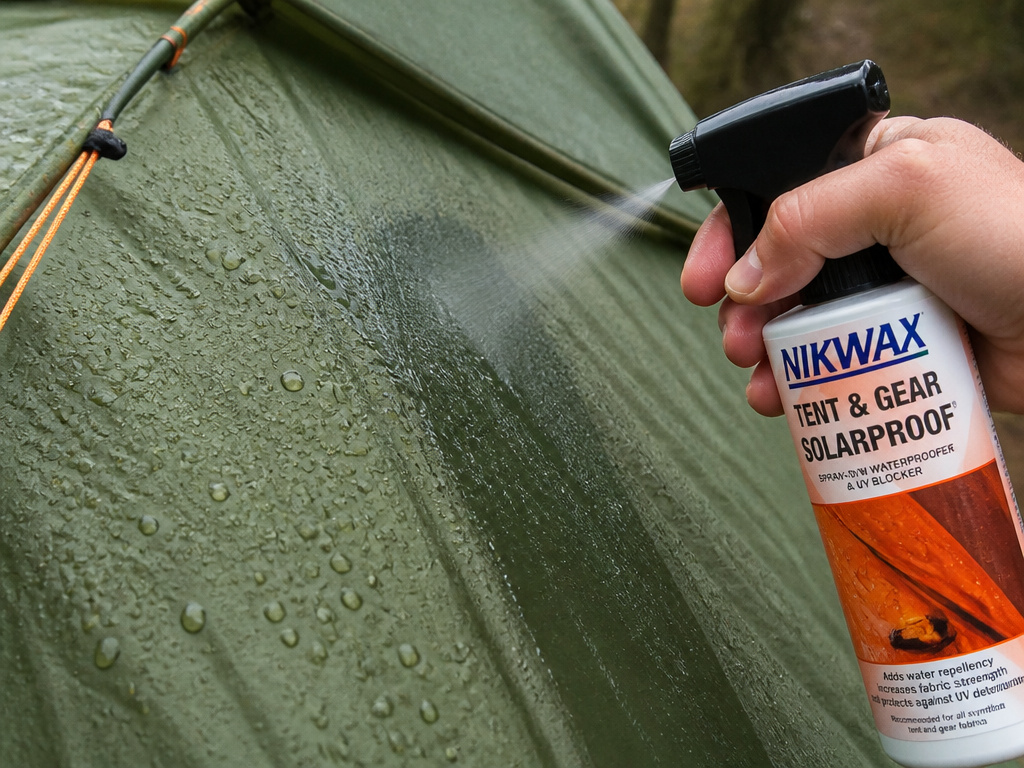
Hydrostatic head (HH) is the lab measurement of how much water pressure a fabric can withstand before it leaks. A 2000mm rating means the fabric resisted a two-meter column of water. That’s the baseline for a three-season tent.
For most weekend trips, 2000mm is enough. For sustained downpours, coastal climates, or severe weather tents used in four-season conditions, it’s not.
Upgrading to a 3000mm HH or higher treatment matters when the rain doesn’t stop. Water pressure builds on the fly. After hours of heavy rain, a 2000mm-rated fabric can begin to wet through, a phenomenon called “hydrostatic pressure penetration.” The fabric isn’t leaking at the seams; it’s permeating through the weave itself.
You upgrade the HH rating by using a higher-rated DWR spray or waterproofing wash-in treatment. These products don’t change the base fabric’s rating, but they add a durable water-repellent layer that increases the effective pressure threshold.
Consider the upgrade if you camp in the Pacific Northwest, Scotland, or any region where rain is a constant, not an event. It’s also a smart move for lightweight Naturehike models and other affordable tent brands that often use thinner, lighter fabrics to hit a price point.
The 7-Step Waterproofing Process (and the One Step Nobody Skips)
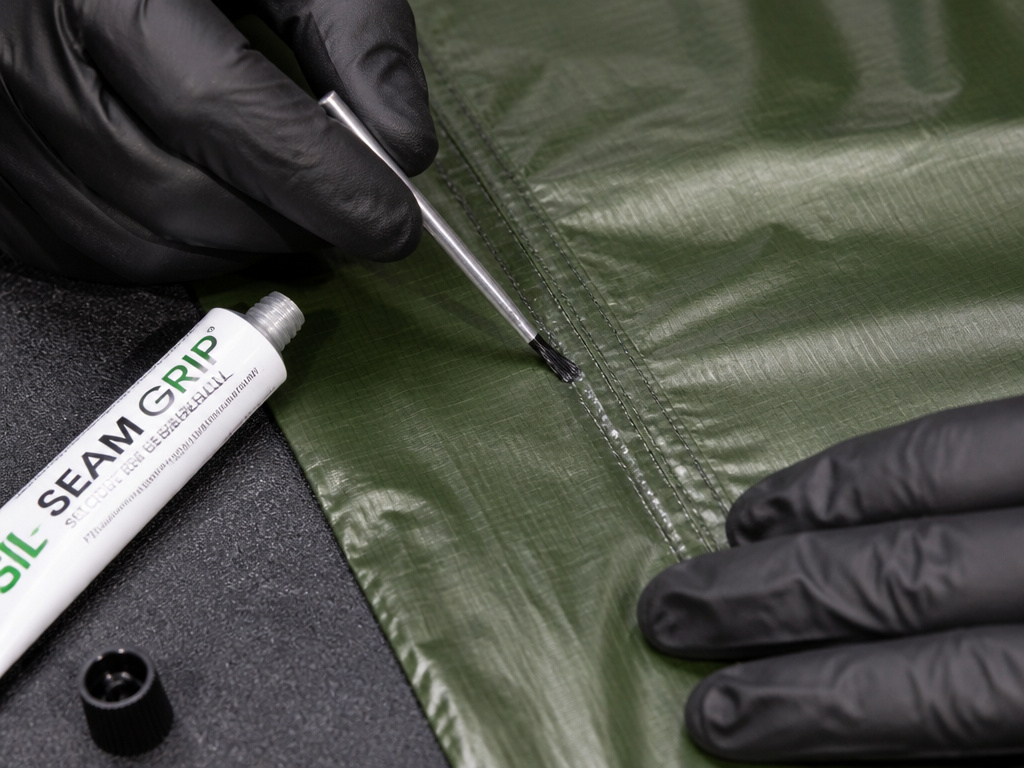
Gather your essential camping gear: a soft brush, mild soap, the correct seam sealant, a small applicator brush, DWR spray, and clean cloths. Do this on a dry, calm day.
- Set Up & Identify. Pitch your tent fully or lay the rainfly flat. Identify every stitched seam on the fly, canopy, and bathtub floor. Mark them with a piece of painter’s tape if needed. This is the scan.
- Clean Everything. Dirt and oils prevent sealant from bonding. Use a soft brush, lukewarm water, and a mild, non-detergent soap (like Nikwax Tech Wash). Scrub gently, rinse thoroughly, and let it dry completely, for a full 24 hours in the shade. Sun drying can degrade coatings.
- Apply Seam Sealer. Working on a stable surface, apply a thin, continuous bead of your chosen sealant along every marked seam. Use the applicator brush to work it into the stitching. Avoid globs; a thin, even layer is stronger and dries faster.
- Refresh Urethane (PU Tents Only). Inspect the inside of the fly and floor for flaking, sticky, or discolored PU coating. Gently wipe away loose flakes. Apply a fresh, thin layer of PU sealant to these worn areas, feathering the edges into the good coating.
- Let Sealants Cure. This is the step everyone skips. Sealants need 24–48 hours to fully cure, depending on humidity and temperature. Touching or folding the tent before it’s cured smears the sealant and creates weak spots.
- Apply DWR Spray. Hang the dry rainfly. In a well-ventilated outdoor area, spray DWR evenly over the entire exterior from 6–8 inches away. Immediately use a clean, dry cloth to rub it into the fabric. A second person helps with large tents.
- Final Cure. Let the tent dry and cure for another 24–48 hours in a dry, shaded, airy spot before packing. Packing it damp guarantees mildew.
Before you start: Work in a well-ventilated area, preferably outdoors. Sealant fumes are strong. Wear nitrile gloves, sealant sticks to skin and is difficult to remove. Keep sparks and open flames away; some products are flammable.
The skipped step is the cure time. People apply sealant, wait a few hours, spray the DWR, and pack the tent away. The sealant hasn’t fully cross-linked. It stays tacky, the DWR doesn’t adhere properly, and everything comes out as a gummy mess next season. Give it the full time.
When To Tape, When To Seal, When To Call A Pro
Seams are the weak point. You have three options: tape (factory-applied), liquid sealant (field repair), or professional re-taping.
Factory tape is a strip of waterproof material heat-welded over the stitches inside the seam. It’s the gold standard. If this tape is peeling, your best option is often to send the tent to the manufacturer or a specialist like Terra Nova for professional re-taping.
While some online tutorials suggest seam taping a tent at home with a household iron, this approach carries a significant risk of irreversibly damaging the tent fabric. The iron’s heat is uneven, and without industrial pressure, you create weak spots that fail faster than the original tape.
Liquid sealant is for field repairs or tents that never had factory tape (common on older or budget models). You apply it to the outside of the seam, filling the needle holes. It’s a barrier, not a weld.
If the factory tape is intact but you’re adding insurance for heavy weather, seal the outside of the seams. The tape handles the inside; your sealant adds a second external layer. This is a good practice for tents for extreme weather.
Tools & Products You Actually Need
You don’t need a garage full of gear. This short list covers it.
- Soft Sponge or Brush: For cleaning. A stiff brush can damage coatings.
- Mild, Non-Detergent Soap: Nikwax Tech Wash or a similar product. Dish soap leaves a residue.
- Correct Seam Sealant: Gear Aid Seam Grip SIL for silicone tents. McNett Seam Grip for PU tents.
- Small Applicator Brush: Often comes with the sealant. A cheap foam brush works.
- Durable Water Repellent (DWR) Spray: Nikwax TX.Direct Spray-On or Grangers Performance Repel.
- Clean, Lint-Free Cloths: For rubbing in the DWR spray.
- A Second Person: For spraying DWR on large rainflies. One sprays, one rubs it in immediately.
A camping accessory like a gear loft or a portable tent lantern won’t help here. This is a chemical job, not a gadget job.
Frequently Asked Questions
Can I use a generic waterproofing spray from the hardware store on my tent?
No. Those sprays are often for canvas tarps or patio furniture. They contain solvents that can degrade the delicate polyurethane or silicone coatings on a tent fly, turning it sticky or brittle. Always use a DWR spray formulated for technical outdoor fabrics.
How often should I re-waterproof my tent?
Reapply DWR to the rainfly once a season or whenever water stops beading up on the fabric. Seam sealant lasts 2–3 years with normal use, but inspect it before every major trip. If it’s peeling, cracked, or feels gummy, it’s time to strip and reapply.
My tent floor feels sticky. What happened?
The polyurethane coating has degraded. This is common with age, heat, and improper storage. Gently wipe away the sticky residue with a dry cloth. Then apply a fresh, thin layer of PU sealant to the affected area. Let it cure fully before using the tent.
Can I waterproof a tent in the rain?
Absolutely not. All products require a clean, dry surface to bond. Applying sealant or DWR to a wet tent traps moisture underneath, leading to immediate failure and likely mildew. Always waterproof on a dry, sunny, low-humidity day.
Does waterproofing add a lot of weight to my tent?
proper application of seam sealant and DWR spray adds negligible weight, maybe an ounce or two total. The myth of heavy waterproofing comes from people applying too-thick layers of sealant. A thin, even coat is stronger and lighter.
The Bottom Line
Waterproofing a tent isn’t about dumping a bottle of spray on it. It’s a chemical matching game. Silicone fabric gets silicone sealant. PU fabric gets PU sealant. The bathtub floor design is your first line of defense, and a 3000mm HH treatment is your upgrade for serious weather.
The real work happens before you touch a brush: identifying your tent’s coating, cleaning it thoroughly, and waiting for every layer to cure fully. Skip the cure time and you’ll do the job twice. Forget the fabric type and you’ll do it three times.
Your shelter is your most important piece of tent camping equipment. A dry tent turns a storm into an adventure. A wet one ends the trip. Match the chemistry, follow the steps, and give it the time it needs.
