
How to Set Up a Party Tent: A Pro’s Step-by-Step Guide
This post contains affiliate links. As an Amazon Associate, we earn from qualifying purchases.
To set up a party tent correctly, you must follow a specific pole and connector sequence, secure the roof cover before fully raising the frame, and always use more anchors than the manual suggests. I follow the MDM Products assembly guide, which details using connector #5 and #7 at the tent ends and warns that installing legs in wind requires doing one side at a time with extra precautions.
I’ve lost count of the party tents I’ve pitched, both for my own backyard gatherings and while helping friends with events. The difference between a smooth, secure setup and a stressful, wobbly disaster almost always comes down to three things: respecting the parts, preparing the site, and anchoring for real-world weather, not just a calm afternoon.
Most guides make it sound like you just snap some poles together. They gloss over the fact that leg poles and rafter poles are different lengths, and mixing them up doesn’t just make assembly harder—it can permanently damage the frame. I’ve seen a bent connector shear a pin because someone used a rafter as a leg. Let’s get it right the first time.
Key Takeaways
- Leg poles (#1 & #2) are the shortest; using a longer rafter pole in their place will bend the sharp-angled connectors and can snap the locking pins.
- Always assemble the entire roof frame flat on the ground first. Lifting a partially built structure twists the joints and risks collapse.
- In any breeze, attach the roof cover with extra bungee cords before raising the sides to prevent it from acting like a giant, uncontrollable sail.
- Manufacturer stake counts are minimums for calm conditions. Anchor Industries explicitly states their suggested number may not meet local wind codes.
- These are fair-weather shelters. MDM’s warranty is voided by damage from snow, cold, or inclement weather, so take them down when storms threaten.
What’s the Correct Pole and Connector Sequence?
The biggest mistake is treating all poles as interchangeable. They are not. A typical frame, like the one in the MDM Products manual, uses four pole types (#1-#4) and four connector types (#5-#8). Getting this sequence wrong stresses the frame from the moment you lift it.
Leg poles (#1 and #2) are the shortest of the four pole types. Corner leg poles (#2) have pre-drilled holes for attaching the roof cover with S-hooks. Connectors with a sharp bend (#7 and #8) connect leg poles to rafters (#4) and cross poles (#3). Connectors with a shallow bend (#5 and #6) connect rafters and cross poles at the tent’s ridge.
The golden rule? Build the roof lattice completely on the ground. Connect all the rafter poles (#4) and cross poles (#3) using only the shallow-bend connectors (#5 and #6). Do not attach the legs yet. This creates a single, rigid unit that can be lifted evenly.
TL;DR: Assemble the entire roof structure flat on the ground using connectors #5 and #6. Only add the legs with connectors #7 and #8 once the roof frame is square and ready to lift.
Connector Reference Guide
Use this table to match parts correctly. The numbers correspond to those in the MDM Products party tent assembly diagram.
| Part Number | Part Name | How to Identify It | Its Job |
|---|---|---|---|
| #1 & #2 | Leg Poles | Shortest poles; #2 has extra holes for S-hooks | Form the vertical supports |
| #3 | Cross Poles | Medium length, forms the roof’s width | Connects rafters across the tent width |
| #4 | Rafter Poles | Longest poles, form the roof’s length | The main horizontal roof supports |
| #5 & #7 | Three-Way Connectors | Used at each end of the tent | Joins a rafter, cross, and leg pole together |
| #6 & #8 | Two-Way Connectors | Used along the sides of the tent | Joins a rafter and cross pole where no leg is present |
Common mistake: Using a sharp-bend connector (#7 or #8) at the ridge where the shallow-bend ones (#5, #6) belong. The angle is wrong, the joint won’t seat, and the frame will rack, putting immense stress on the pins.
If your tent’s manual is missing, sort poles by length. The shortest two sets are the legs. Test-fit connectors on the ground; the right one will align the poles smoothly without force.
How Do You Choose and Prepare the Perfect Site?
A level, clear site is more important than a fast setup. A slope of more than two inches over ten feet will cause water to pool underneath, creating a muddy mess and a hazard for any electrical cords.
Walk the entire footprint. Feel for soft spots, buried sprinkler heads, and sharp rocks. A single unseen rock under a foot plate creates a point load that can buckle a leg.
I once set up a 20×20 tent on a seemingly perfect lawn. A buried sprinkler head, hidden by grass, was right under a corner. A heavy rain softened the ground, the leg sank, and the twisted frame tore the roof cover when the wind picked up later. The repair cost more than a new budget-friendly tents.
Look up, too. Avoid trees that shed hard fruit like walnuts or apples. The MDM manual specifically warns these can puncture the cover. Even pine cones, while less damaging, can leave permanent sap stains.
Plan for drainage. The ground should slope away from the tent slightly. On perfectly flat ground, consider a shallow perimeter trench to channel water away. This isn’t overkill—the Anchor Industries installation guide states to “plan drainage to prevent water from running into the unit.”
What’s the Safest Way to Lift the Frame with Two People?
The manual often assumes a crew of four. With two, the method is to lift and secure one side at a time. First, ensure every joint in your ground-assembled roof lattice is pinned and tight.
- Both of you lift one long side of the roof frame.
- One person holds it steady while the other slides the leg poles (#1 or #2) into the sharp-bend connectors (#7 or #8) on that side only. Do not attach foot plates yet.
- Secure this raised side with a temporary guy line tied to a heavy object like a cooler or sandbag.
- Move to the opposite side and repeat the process.
- Once all four legs are inserted and the frame is standing, go to each corner, slide on the foot plate, align the holes, and drive in the locking pin with a rubber mallet.
Before you start: The frame and cover are heavy and act as a sail in wind. Never walk under an unsecured, partially raised frame. Use temporary guy lines for stability and wear gloves—aluminum poles often have sharp edges.
Using a steel hammer can mushroom the pin heads, making them impossible to remove later. A rubber mallet provides enough force without damage.
How Do You Secure the Cover and Walls in Wind?
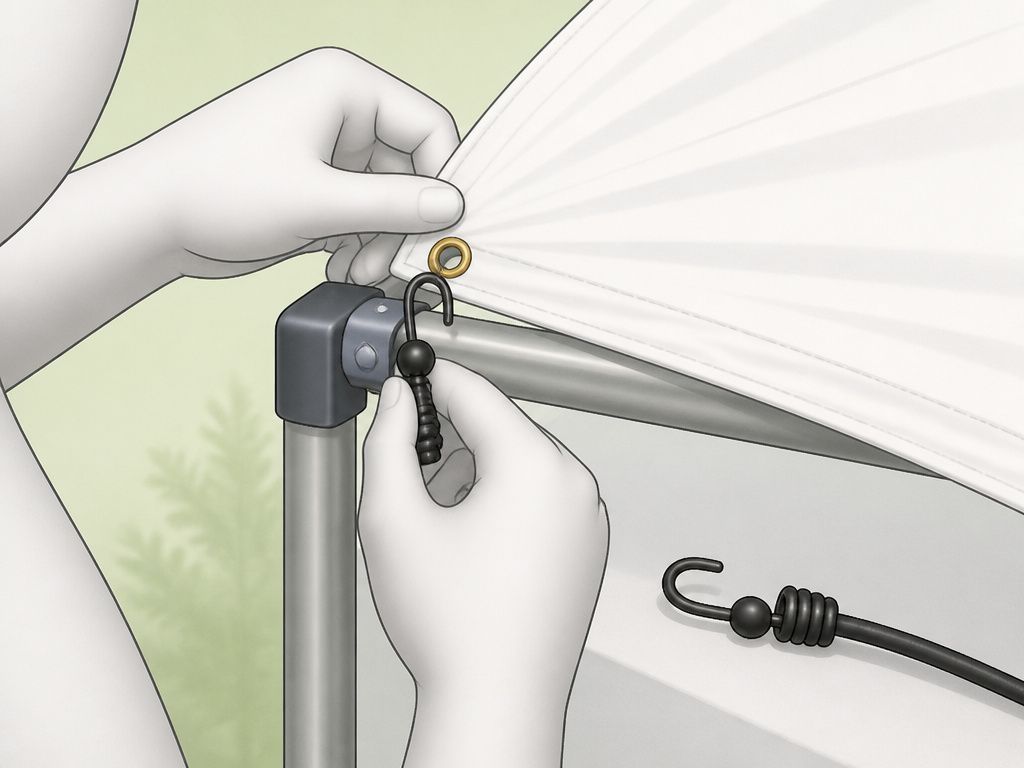
The roof cover is typically a UV-protected polyethylene material (ASTM-5 approved, per MDM). It’s tough but can be scratched if dragged. Drape it evenly over the raised frame, aligning grommets with frame corners.
Start by hooking a bungee cord (#13) from a corner grommet to the frame. Then move to the opposite corner, then the remaining two, pulling the cover taut diagonally to avoid wrinkles. A wrinkled cover will flap violently, wearing holes at the grommets.
If you’re adding sidewalls, consult your manual. For end walls, MDM advises clipping them to the rafter poles before raising the tent to full height, which is much easier. Side walls are usually attached after.
In windy conditions, use extra bungee cords to secure the roof cover before attaching any side panels. The manual is clear: “If it is windy, use guy ropes to stabilize the tent before attaching side panels.” A loose sidewall can catch wind and pull a stake straight out of the ground.
For illuminating your event after dark, exploring various tent lighting options is a great next step.
Why Are More Stakes and Guy Lines Non-Negotiable?
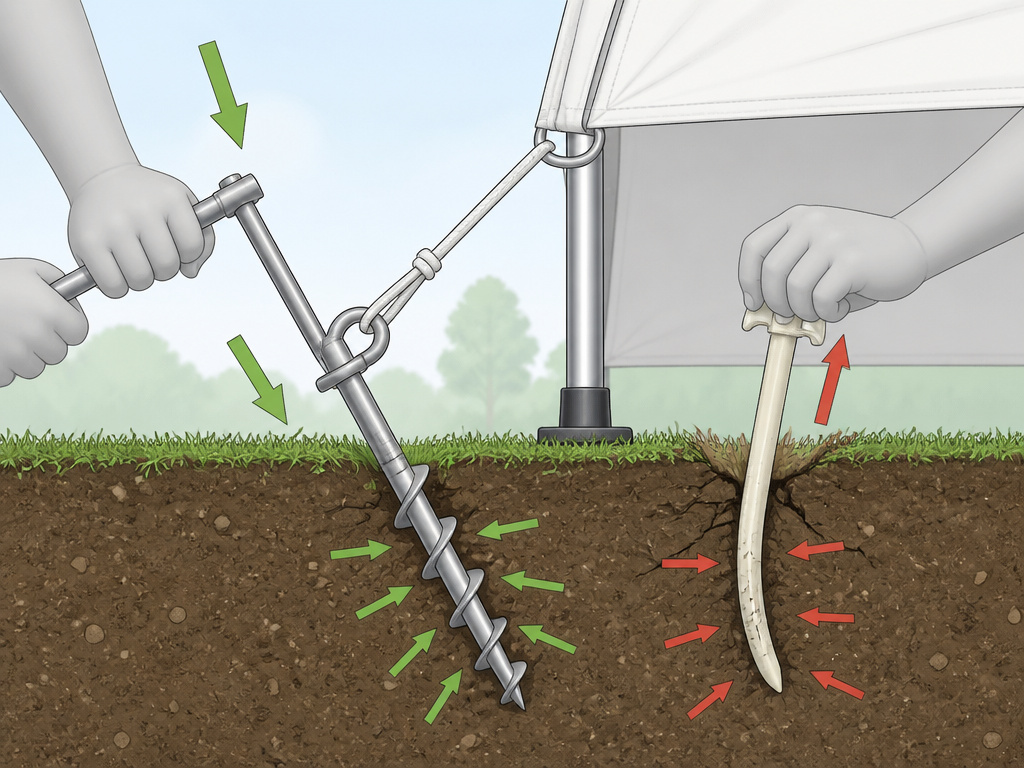
The stakes included in the box are a starting point, not a prescription. Anchor Industries states plainly: “The number of stakes suggested… may not meet all relevant codes and may be insufficient to keep the tent secure in high winds. It is the installer’s responsibility… to determine the appropriate number of stakes.”
For a 20×32 tent on grass, I use a minimum of twenty 12-inch steel spiral stakes. The plastic pegs often bend on first use.
| Anchor Type | Best Use Case | Minimum Depth | Realistic Wind Hold |
|---|---|---|---|
| 10″ Plastic Peg | Hard, flat surfaces only | 6 inches | Up to 10 mph |
| 12″ Steel Spiral Stake | Grass, loose soil | 8 inches | 15-25 mph (with guy lines) |
| 18″ Rebar Stake | Sandy soil, high-wind areas | 12 inches | 25+ mph (with deadman anchors) |
Drive pegs (#17) through the cover’s bottom loops at a 45-degree angle away from the tent. This uses the soil’s shear strength. Straight-down stakes pull out easier.
Common mistake: Staking only the cover’s loops. The frame itself can still lift. Guy ropes (#16) attached directly to the frame structure transfer wind load into the ground, which is why they’re mandatory in windy setups. Attach them to secondary stakes placed 3-4 feet out, forming a 45-degree angle to the ground.
Always check tension on all stakes and lines after the first hour, as soil settles and ropes stretch. This is part of your essential tent camping equipment checklist.
When Should You Take the Tent Down Immediately?
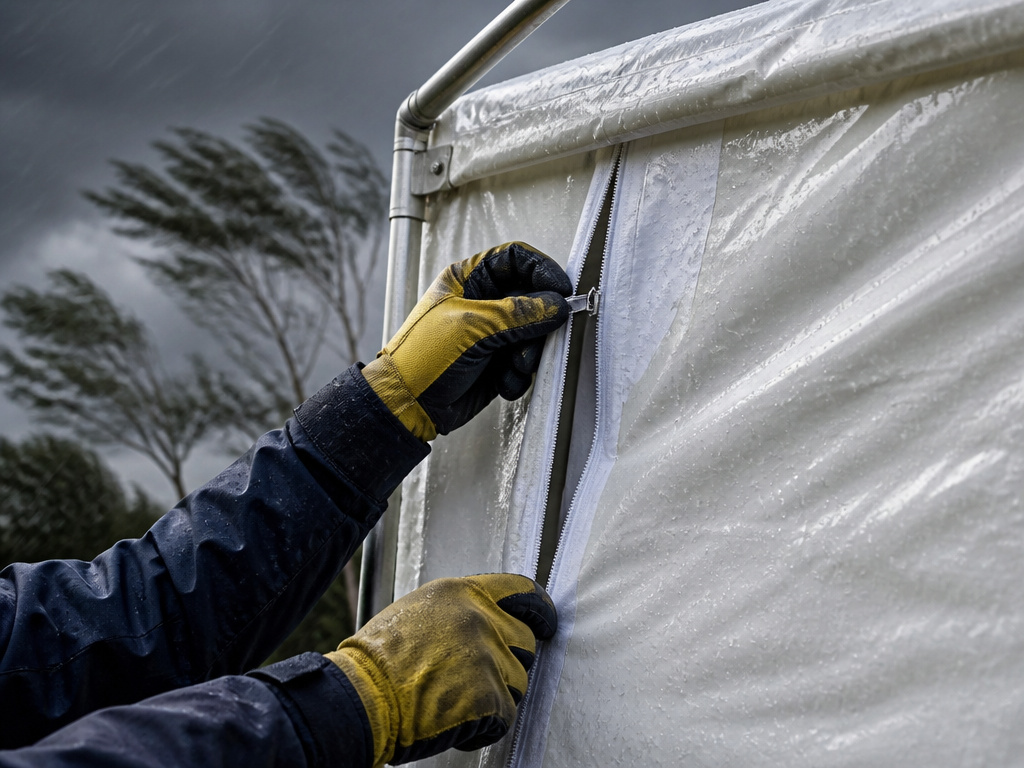
These are not four-season shelters. The MDM manual is explicit: tents are “NOT intended for use in inclement weather or year-round” and the warranty voids for damage from “snow, wind, or any acts of nature.”
- High Wind: Forecasts of sustained winds above 25 mph mean take it down.
- Snow or Ice: The polyethylene cover becomes brittle near freezing. A snow load will collapse the frame. As the Anchor Industries guide notes, you must remove snow and ice “as soon as possible because accumulation will damage the tent.”
- Heavy, Prolonged Rain: While they handle rain, if it’s turning to a storm with high winds, err on the side of caution.
After your event, let the cover dry completely before packing it away. A folded wet cover breeds mold that weakens the fabric. I drape mine over a fence for a full sunny day. For storage, consider a durable canvas tents bag if yours is flimsy, as it provides better protection.
Frequently Asked Questions
How many people do you need to set up a party tent?
You need at least two people for safe assembly. While one person can lay out parts, lifting and securing the roof frame requires two. For larger tents (over 20×30), three or four people make the process much faster and safer.
Can you leave a party tent up for a week?
Only if the weather remains perfectly calm and dry. These tents are designed for temporary events, not prolonged exposure. Constant UV exposure, dew, and even mild winds over days will stress the fabric and fittings. Always dismantle and store it between events.
What’s the best way to secure a tent on concrete or pavement?
You must use weighted foot plates or water barrels—staking is impossible. For a 20×32 tent, you need substantial weight: at least 50 pounds per leg to resist a moderate breeze. You can also use ratchet straps to anchor the frame to fixed, secure structures. Never rely on the tent’s own weight.
How much space do I need per person?
For a standing cocktail party, allow 10-15 square feet per person. For seated dining with tables, plan for 20-25 square feet per person. This means a common 20×30 tent (600 sq ft) comfortably fits 40-60 people standing or about 24 for a seated dinner. For bigger groups, look into tents for large gatherings designed for higher capacities.
What’s the difference between a party tent and a camping tent?
Party tents are large, semi-permanent frame shelters designed for group events in backyards or fields. Camping tents are smaller, portable shelters for overnight outdoor stays. If you need standing room for a group, you’d want a tall party tents design, not a standard camping dome.
Are pop-up party tents any good?
For small, quick events, they can be excellent. Modern pop-up tent designs are fantastic for beach days or last-minute shade. However, they are generally less stable in wind and not suitable for large, formal, or multi-day events where a traditional frame tent is the reliable choice.
What Actually Matters
Setting up a party tent is a logic puzzle with one right answer. Respect the parts list—short poles are legs, long poles are rafters. Build the roof on the ground, lift it one side at a time, and secure the cover before it can catch the wind.
The most critical upgrade you can make is to your anchoring. Ignore the minimum stake count in the manual. Your local wind conditions and soil type dictate what you need. A tent secured for reality stays put. A tent secured to the manual might not.
Finally, know its limits. This is a fair-weather friend. When the forecast turns, get it down and dried. That patience is what turns a box of poles and a tarp into a shelter that makes your event memorable for all the right reasons. For those hot summer events, planning for tent cooling systems can be the difference between a comfortable party and a sweltering one.
