
How to Set Up a Tent: A Pro’s Guide to Perfect Pitch
This post contains affiliate links. As an Amazon Associate, we earn from qualifying purchases.
To set up a tent, you must first prepare a flat, debris-free site and lay out a ground tarp. Assemble the pole frame, attach it to the tent body via clips or sleeves, and raise the structure. Secure it by driving all stakes at a 45-degree angle away from the tent to resist wind forces, then tension the rain fly. This method, validated by industry standards, prevents the two primary stake failure modes: pull-out and lateral push-through.
I remember the exact sound, a sharp pop followed by the sickening whoosh of nylon collapsing. It was in the North Cascades, and I’d gotten lazy with my MSR Hubba Hubba NX, hammering the stakes straight down because the ground was hard. A midnight gust did the rest, yanking a stake and sending the vestibule down onto my pack. My Osprey Atmos AG 65 spent the rest of the trip damp. That lesson, written in soggy gear, taught me that setup isn’t about speed; it’s about physics you can trust when you’re asleep.
This guide is the one I wish I’d had. It blends the hard rules from official handbooks with the knuckle-bruising lessons from hundreds of pitches.
Key Takeaways
- The 45-degree stake angle is non-negotiable. It creates equal vertical and lateral holding forces, which the industry handbook states is optimum for resisting both pull-out and soil bulge failure.
- Always perform a backyard trial run. Unfamiliarity breeds frustration, especially in fading light or bad weather. A 20-minute dry run saves an hour of campsite confusion.
- Your ground tarp (footprint) is a wear item, not an accessory. It protects the tent floor from abrasion and hidden moisture. Cut a generic tarp slightly smaller than the tent floor to avoid channeling water underneath.
- Final tension is a multi-step process. Stake the tent body first, then fully tension the rain fly and guylines. A drum-tight fly is critical for shedding wind and rain.
- Setup continues after you move in. For tents left standing more than a few days, the professional guide recommends checking tension every three to seven days as fabric relaxes and stakes settle.
What is the single biggest mistake when staking a tent?
Stake failure occurs in two primary modes: tension failure (insufficient friction causing pull-out) and lateral force failure (sideways force exceeding soil resistance, causing the stake to push through). An optimum guy rope angle of 45 degrees produces vertical forces equal to the lateral forces, maximizing holding power.
The most common and consequential error is driving stakes straight down into the ground. It feels intuitive, get it deep, it’ll hold. But wind applies a mostly lateral, sideways force to your tent. A vertical stake is excellent at resisting being pulled straight up, but terrible at resisting that sideways push. The result is often a “lateral force failure,” where the stake simply tips over or plows through the soil, as described in the official tent safety standards document.
The fix is simple yet transformative: always stake at a 45-degree angle away from the tent. This angle leverages the soil’s resistance in both directions. It’s the industry-standard compromise that turns a flimsy spike into a reliable anchor. I learned this after my Cascade mishap and haven’t had a stake fail since, even in the gusty plateaus of the Peak District with my @dacia_uk crew.
TL;DR: Hammer stakes at a 45-degree angle, not 90. This angle is engineered to resist the sideways pull of wind, which is what actually collapses tents.
How do you choose and prepare the perfect campsite?
Your tent can only perform as well as the ground beneath it. Rushing this step guarantees a lumpy, wet, or dangerous night.
First, use your eyes and feet. Scan for a spot that’s naturally flat and well-drained. Avoid depressions where water will pool. Then, walk the area. Feel for hidden rocks or roots underfoot. Clear every pinecone, twig, and pebble. That one small stone becomes a pressure point that feels like a boulder at 3 AM.
If the only viable spot is already damp, your priority shifts to moisture management. As the MSR manual advises, you must maximize ventilation to combat condensation. This means orienting doors to catch breezes and ensuring your rain fly is properly spaced.
Before you start: A poorly chosen site risks physical injury from tripping on unseen roots, damage to your tent floor from sharp debris, and sleep disruption from water pooling inside. Always scout thoroughly in daylight.
Now, lay your ground tarp. The shiny, coated side faces up. Unfold your tent body on top. Many systems, like those on popular two-person backpacking tents, use color-coded tabs, a red tab on the footprint matches a red clip on the tent. This foolproofs your alignment and door orientation.
What’s the right order for assembling poles and clipping the tent?
This is where the satisfying snap-click of shock-corded poles comes in. But there’s a technique to it.
- Lay out and identify. Unbag all poles and group them by length. Most quality tents, from a Coleman Sundome to a Big Agnes Copper Spur, use 7001-T6 aluminum. The thicker ones are usually the main supports.
- Connect segments gently. Guide the shock cord; don’t force misaligned ferrules. If you meet resistance, back out and realign.
- Choose your attachment method. This is critical for speed and stability.
- Clips: Start at one corner, clip a few along the pole, then move to the diagonal opposite corner to create tension. Never clip one entire side first, it creates a frustrating, slack fight.
- Sleeves: Feed the pole from the center outward to avoid bunching fabric. This common method on storm-ready tents for heavy rain is slower but more secure.
| Attachment Type | Ideal Use Case | Key Technique | Risk of Error |
|---|---|---|---|
| Clip System | Fast setups, fair weather, most modern backpacking tent options. | Work diagonally to maintain even tension. | Clips not fully seated on the pole can pop off in wind. |
| Sleeve System | High-wind or alpine conditions, older expedition tents. | Feed from the middle out to prevent fabric snags. | Forcing a snagged pole can tear the sleeve fabric. |
| Hybrid | Versatile Marmot tent models designed for mixed conditions. | Consult the manual first to identify primary poles. | Misrouting a pole leads to a misshapen, unstable frame. |
- Seat the poles. Insert each pole end into its corner grommet. It will bend, this is normal and creates the structural tension. Lift the center; the tent should pop into shape.
Common mistake: Clipping all attachments on one side before starting the opposite side. This leaves the tent body slack, making the final clips nearly impossible to secure and creating a wobbly structure.
When and how do you attach and tension the rain fly?
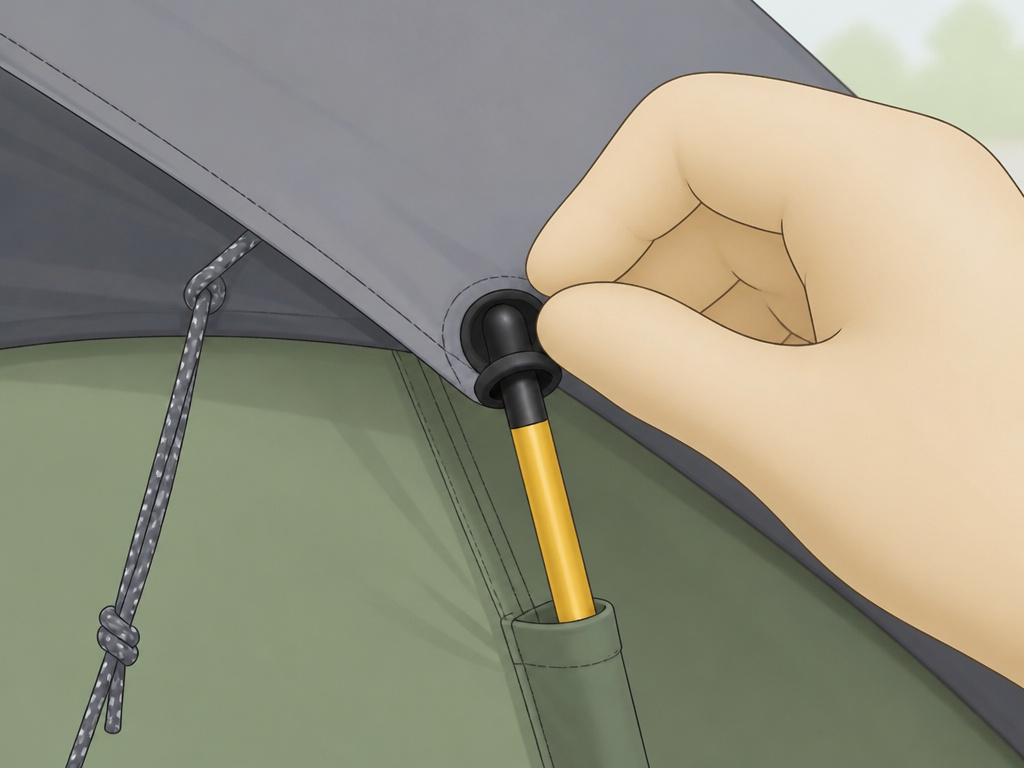
The rain fly is your weather shield and a key component of stability. Never skip it, even under a starry sky.
Drape it over the erected tent, aligning the doors. Use those color-coded tabs if you have them. Then, connect the fly to the frame. Look for grommets or loops on the fly’s underside that slide over the ends of the poles you just seated. This physical connection is what stops the fly from shifting.
Do not fully tension it yet. Just get it situated. The final, critical tensioning happens after the tent body is staked.
For larger shelters like stand-up tents or spacious camping tents, enlist a helper. One person can hold a corner high while the other walks the fly over. Trying this solo in a breeze is a comedy of errors.
What’s the professional method for staking and guying out?
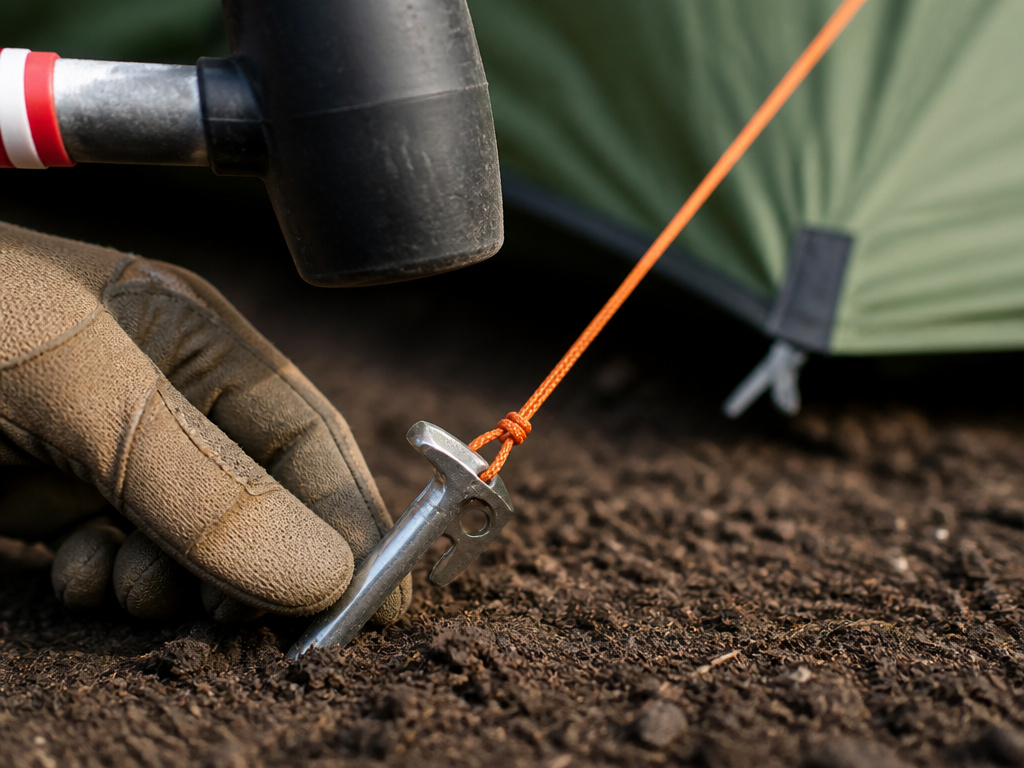
Now we apply the 45-degree rule. This transforms your setup from a fair-weather shelter to a storm-ready bunker.
Start with the four corners of the tent body. Push a stake through the loop (often combining tent and fly fabric). Hold it at that 45-degree angle away from the tent. Drive it in completely using a rubber mallet, the Coleman 4-in-1 is perfect, as it won’t mushroom aluminum stakes like a rock will. I learned this after ruining a set of MSR Groundhogs with a granite fist.
After corners, secure any side loops. Finally, extend the guylines from the rain fly. Pull each taut and stake them out, again at 45 degrees. Keep the point where the line meets the stake as low to the ground as possible, no higher than a few inches, to minimize leverage.
| Symptom | Likely Cause | Severity | Immediate Fix |
|---|---|---|---|
| Stake lying flat on ground, hole is clean. | Tension/Pull-Out Failure. Stake was vertical or angled toward tent. | High – Corner is completely compromised. | Re-stake at 45° away, using a longer stake. |
| Stake tilted, soil upheaved in front. | Lateral Force Failure. Stake pushed sideways through soil. | High – Structure is losing tension. | Re-stake at 45° in firmer spot; consider a deadman anchor. |
| Guy line is slack, fly is flapping. | Inadequate tension or stake creep. | Medium – Noisy, reduces weather resistance. | Re-tension line and re-seat stake; check after 24 hours. |
For large or rectangular tents on tricky sites, the pro method is “pre-staking.” Lay out and stake the tent’s perimeter first using the diagonal measurement formula (A² + B² = C²), then position the tent within it. This is essential for big family car camping tents.
TL;DR: Stake all corners at a 45-degree angle away from the tent, then secure guylines low and tight. This sequence locks the structure before final fly tensioning.
How do you finish the setup for maximum comfort and safety?
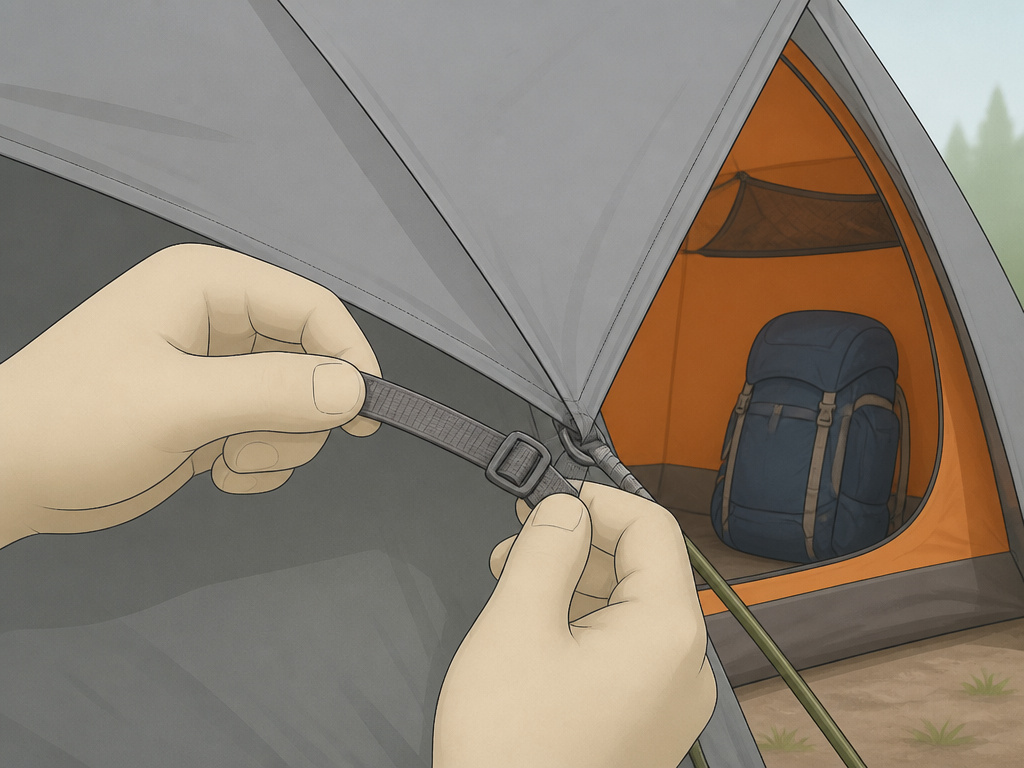
With the skeleton secured, it’s time to skin the tent tightly and move in.
Go back to every rain fly adjustment strap and buckle. Cinch them down. The fly should be drum-tight, with no loose fabric to flap or pool water. A proper gap between fly and tent body creates a vestibule, your mudroom for storing wet tent camping accessories like boots.
Step inside. The interior fabric should be smooth, with no sagging walls touching you. If it is, condensation will transfer directly to your sleeping bag. Go back out and adjust pole positioning or fly tension.
Finally, organize your home. Use the gear lofts, line your packs along the walls, and hang a light from the central loop. This is when a shelter becomes a campsite.
What are the advanced techniques for difficult conditions?
Not every pitch is on a soft, forested floor. Your method must adapt.
- Soft Ground (Sand/Snow): Standard stakes are useless. You need deadman anchors. Bury a stuff sack filled with sand, a log, or a cluster of sticks, and tie your guyline to that.
- High Wind: Add extra guylines to the windward side. Some premium tent options include extra webbing loops. Stake everything twice as diligently.
- Long-Term Setup: If your tent is staying up for a week (at a festival, for instance), note the industry advice: check all tension every three to seven days. Fabric stretches, stakes creep, and a loose tent is a vulnerable one.
- Large Group Tents: For massive tents for big groups, follow a specific tensioning sequence from the center sections outward to avoid a twisted frame.
“The manufacturer’s instructions must be followed. Those instructions take precedence over any conflicting instructions… In the event of a conflict, follow the manufacturer’s instructions and warnings.” This quote from the industry handbook is your ultimate rule. Your specific tent models for two or eight may have unique quirks.
Frequently Asked Questions
How long should it take to set up a tent for the first time?
Budget 30-45 minutes for a first-time setup of a typical dome tent. This includes reading the manual and troubleshooting. After a few practices, you can cut that to 10-15 minutes. A backyard rehearsal is the best way to shrink this timeline dramatically.
Can you realistically set up a large tent alone?
Yes, but it requires strategy. For large car camping tents, stake down one corner immediately after raising the frame to act as an anchor. Then, methodically work your way around, using the pre-staking method if needed. A second person is helpful but not always essential.
Is a ground tarp necessary with a “bathtub” floor?
Absolutely. A bathtub floor (where waterproof material extends up the walls) prevents seeping water, but it does not protect against abrasion, punctures, or ground moisture. A footprint is a sacrificial layer that greatly extends your tent’s life.
How tight should the rain fly actually be?
It should be taut enough that you cannot easily pinch a large fold of loose material. There should be no sagging panels that can pool water. However, avoid overtightening to the point of distorting the pole structure or straining seams.
What if I lose or break a stake?
Carry a few extra stakes in your camping trip gear list. In a pinch, you can use a sturdy, stout stick as a deadman anchor, or securely tie a guyline to a large, buried rock.
Before You Go
Pitching a tent correctly is the quiet foundation of a good camping trip. It’s the difference between a shelter that whispers in the wind and one that rattles and fails. The core principles are simple but profound: practice first, use a footprint, and master the 45-degree stake. That angle isn’t a tip; it’s applied physics that works while you sleep.
Whether you’re opting for streamlined lightweight tents for two or a palatial tent with standing room, these rules hold true. They are distilled from official handbooks and my own library of mistakes made from Utah’s canyonlands to Scotland’s glens. Follow them, and you’ll spend less time wrestling with nylon and more time enjoying the view from your front door.
