
Mastering How To Stay Warm In A Tent In The Winter Safely
This post contains affiliate links. As an Amazon Associate, we earn from qualifying purchases.
To stay warm in a tent in the winter, you must manage three heat-loss vectors: conduction from the ground, convection from wind and drafts, and moisture from your own body. This requires a four-season tent, a sleep system with a pad R-Value of 4.5+ and a bag rated 10–15°F below the forecast, and a strict moisture-management routine that keeps condensation outside your insulation.
Most winter campers fail because they focus only on the sleeping bag. They buy the warmest one they can find, then wake up shivering on a frozen pad in a tent dripping with ice. The cold ground pulls heat straight through a thin mattress. Your own breath soaks the bag’s lining. Wind finds every gap in the fly.
This guide breaks down the gear specs that matter, the non-negotiable campsite moves, and the nightly habits that separate a comfortable night from a survival situation. We will cover tent selection, sleep system math, advanced site hacks, and the critical mistakes that lead to hypothermia.
Key Takeaways
- Your sleeping pad’s R-Value is more critical than your bag’s temperature rating for ground cold; target a combined R-Value of 6.5 or higher for sub-freezing temperatures.
- Always pitch your tent with the main door facing away from the prevailing wind to minimize drafts and prevent snow drifts from blocking your exit.
- Never breathe into your sleeping bag. The moisture from your breath will saturate the insulation, destroying its loft and warmth within hours.
- Change into a dedicated set of dry sleep clothes, including fresh socks, before getting into your bag. Sleeping in the day’s damp layers is a guaranteed way to get cold.
- Ventilation is non-negotiable. Crack a top vent or door slightly to create an airflow path that carries moist air out, preventing internal frost buildup.
The Right Tent Is a Windproof, Condensation-Managed Shell
A summer tent will drain heat and collect ice. A true winter shelter is built to shed wind, manage the immense moisture you produce, and provide a secure anchor in snow.
Four-season tents like the North Face VE-25 or the Mountain Hardwear Trango use steep-walled, geodesic or dome designs. This shape efficiently sheds snow and wind without flapping. The fabrics are stronger, and the poles are heavier-gauge. The official USAP field manual for tents notes that models like the Scott Polar tent are designed for security in strong winds and are “quite warm,” in part because they travel assembled, reducing cold-weather setup complexity.
Common mistake: Using a three-season tent in winter, the fly will flap violently in wind, transferring noise and vibration that ruins sleep and can damage poles, while snow load will sag the roof and risk collapse.
The vestibule is your airlock. Use it to store wet boots, packs, and cookware. This keeps snow and moisture out of the sleeping area. A large vestibule also lets you cook safely out of the elements, a critical consideration when looking at specialized hot tents or canvas tents with stove jacks.
TL;DR: Your tent is a windbreak and moisture manager, not a heater. Prioritize a proven four-season dome or geodesic model with a solid vestibule.
Why Ventilation Is Your Secret Weapon
This feels counterintuitive. You want to seal out the cold. But a sealed tent traps all the moisture from your breath, sweat, and wet gear. That humidity condenses on the cold fly fabric, rains back down on you, and soaks your sleeping bag. By morning, the inside of your tent can be coated in frost.
The fix is controlled airflow. Always crack the top vent or leave the door zipped open a few inches at the top. This creates a chimney effect, allowing warm, moist air to escape before it condenses. As one experienced guide on YouTube put it, “You need to have airflow… people think that oh man it’s winter I got to zip up the whole thing but that’s where the condensation problem occurs.”
| Ventilation Strategy | How-To | Result If Skipped |
|---|---|---|
| Top Vent Crack | Open the ceiling vent 1-2 inches, even in snow. | Condensation freezes on the fly, creating interior frost that falls as snow when you move. |
| Door Gap | Zip the door closed but leave a 3-inch gap at the top. | Stagnant, humid air soaks your bag’s footbox and sleeping pad surface. |
| Cross-Ventilation | Open vents on opposite sides of the tent (if available). | Moisture pools in dead air spaces, leading to wet spots on sleeping bags and clothing. |
The 3-Layer Sleep System That Actually Works
Think of this as a system, not individual items. Failure in one layer dooms the others. The goal is to block conductive heat loss to the ground and convective loss to the air, while keeping insulation dry.
Layer 1: The Ground Insulation (Your Pad)
The cold ground is your greatest enemy. Your sleeping bag’s insulation compresses underneath you, rendering it nearly useless. The pad is what stops conductive heat loss.
The metric is R-Value, which measures thermal resistance. For frozen ground, the Sea to Summit experts recommend an R-Value of 4.5 or higher. Most campers achieve this by layering:
- A closed-cell foam pad (R-Value ~2) directly on the snow. This is durable, never fails, and provides a protective barrier.
- An insulated inflatable pad (R-Value ~4 to 6) on top. The air inside provides cushioning, and the internal reflective foil or synthetic insulation adds warmth.
A foam pad with an R-Value of 2.8 combined with an air mattress with an R-Value of 4 gives a total system R-Value of 6.8. This is the kind of math that keeps you warm at -10°F.
Why-layer: Conduction transfers heat through direct contact. A high R-Value pad creates a barrier of still air and reflective material that drastically slows the rate your body heat is pulled into the colder ground. Without it, you lose heat continuously, no matter how good your bag is.
Layer 2: The Air Insulation (Your Sleeping Bag)
The bag’s job is to trap a layer of warm air around you. Forget the “Survival” or “Limit” rating, those are borderline. Always buy for the “Comfort” rating. A reliable rule from Jackery’s winter camping guide is to select a bag rated 10–15°F lower than the coldest temperature you expect.
If you forecast a low of 20°F, get a bag rated for 5° to 10°F. This buffer accounts for metabolic differences, humidity, and the inevitable cold spots. A mummy-style bag is essential, the hood cinches around your face, leaving only a small opening for breathing.
Shake out your down sleeping bag thoroughly when you unpack it. Down clusters clump during storage. Even distribution restores the loft that creates warm air pockets.
Layer 3: The Moisture & Microclimate Layer
This is your clothing and bag liner. Your goal is to keep the bag’s insulation dry. That means you must be dry when you enter it.
- Change Everything: Before bed, strip off the day’s clothes. They are damp with sweat and ambient moisture. Put on a dedicated set of dry, breathable base layers, merino wool is ideal. Put on fresh, dry socks.
- Use a Liner: A fleece or silk sleeping bag liner adds 5–15°F of warmth. More importantly, it absorbs body moisture and is much easier to wash than your entire bag, preserving the bag’s loft over time.
- Keep the Bag Dry: Never, ever breathe into the bag. The YouTube instructor was blunt: “The death of a sleeping bag is condensation.” Keep your mouth and nose outside. Wear a merino wool balaclava or hat if your face is cold.
| Sleep System Component | Minimum Winter Spec | Real-World Consequence of a Cheaper Choice |
|---|---|---|
| Sleeping Pad | Combined R-Value ≥ 6.5 | Cold seeps up from the ground within 90 minutes, causing shivering and restless sleep. |
| Sleeping Bag | Rated 10–15°F below forecast low | You will reach your personal “limit” rating by 3 AM, awake and unable to get warm. |
| Liner | Fleece or Silk | Body oils and moisture soil the bag’s interior, permanently reducing its loft after a few trips. |
| Pillow | Insulated (not inflatable-only) | Your head conducts heat into an air pillow, creating a cold spot that can trigger a headache. |
Site Strategy: More Than Just Sheltered
Where and how you pitch is a heat-retention tactic. A good site blocks wind, manages snow, and can be modified to improve warmth.
First, find natural windbreaks: a grove of dense trees, a rock wall, or a hill. Never pitch in a valley bottom or a meadow where cold air pools, these spots can be 10°F colder than surrounding areas. Once you have a spot, follow this sequence for snow:
- Walk the footprint of your tent to mark it.
- Flatten the area with snowshoes, skis, or a shovel.
- Wait fifteen minutes. This lets the snow sinter, the crystals bond and firm up, creating a stable platform.
- Pitch your tent, facing the door away from the wind.
Before you start: Securing a tent in snow requires specialized anchors. Standard pegs are useless. Use snow stakes (long, wide plastic or metal stakes) or create “deadman” anchors by burying stuff sacks filled with snow or sticks. A tent collapsing in the night from wind is a severe safety hazard.
Advanced Insulation Hacks for Extreme Cold
These are field-proven techniques for when the temperature plummets.
Snow Trenching: Dig a trench in the snow deep and wide enough to fit your tent inside. The surrounding snow walls provide excellent wind protection and insulation. Use the excavated snow to build additional walls on the windward side.
The Cold Air Sink: Dig a shallow trench (about a foot deep) inside your vestibule or just outside the tent door. Cold air is denser and will settle into this low point, drawing it away from your sleeping area. This works only if your sleeping spot is raised relative to the trench.
Double-Wall Tarp System: If you have a tarp, pitch it over your tent, leaving a gap of 6–12 inches between the tarp and the tent rainfly. This creates a dead air space that acts as a buffer, significantly reducing radiant heat loss on clear, cold nights. This is a key principle behind the efficiency of insulated canvas shelters.
These methods are part of a broader set of winter camping equipment knowledge that goes beyond basic gear.
The Nighttime Ritual: Boiling Water, Bottles, and Bedtime
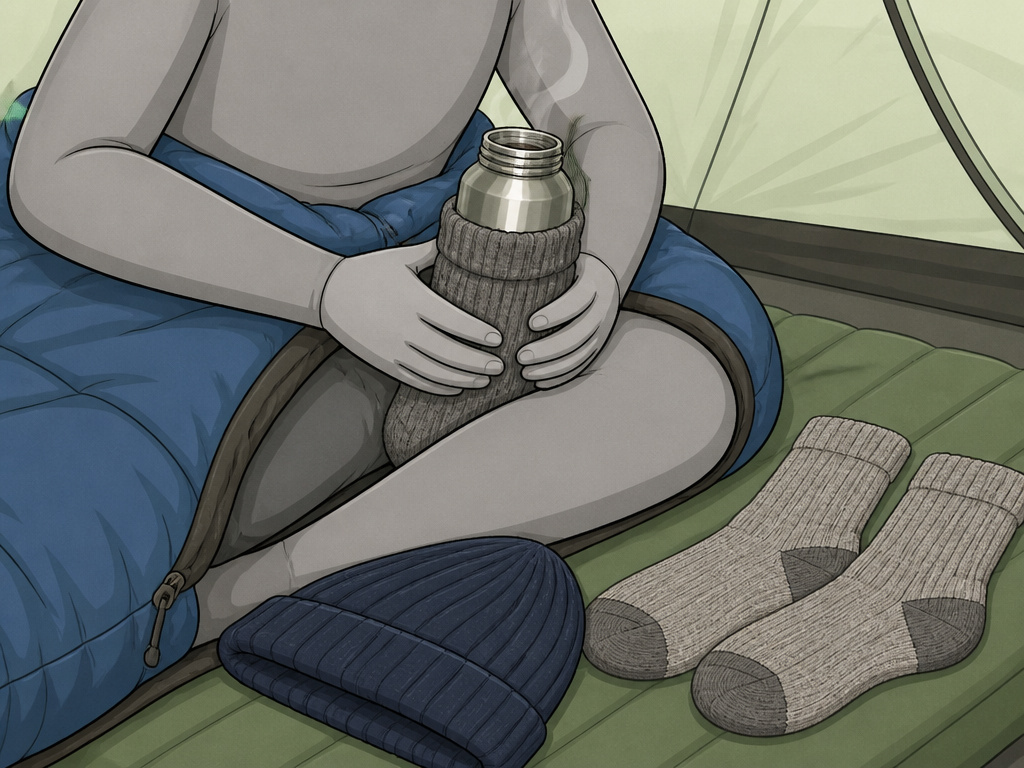
What you do in the hour before sleep determines your night. This ritual is about adding heat, sealing in dryness, and setting up ventilation.
- Eat a High-Fat Snack: Your body is a furnace. Stoking it with slow-burning calories (nuts, chocolate, cheese) about an hour before bed gives it fuel to generate heat through the night.
- Boil Water for a Bottle: This is the most effective trick. Boil water, pour it into a tight-sealing stainless steel bottle like a Nalgene. Wrap it in a sock to prevent burns. Place it between your thighs before you get in your bag. The major arteries there carry warm blood throughout your body. It will stay warm for 6–8 hours.
- Final Clothing Check: Are you in dry layers? Are your socks fresh? Is your hat on? Your head releases a massive amount of heat, a beanie is mandatory.
- Set Ventilation: Before you zip up, open the top vent. Confirm the door is oriented away from the wind.
I learned the bottle trick the hard way. On an early winter trip, I put the hot bottle at my feet. My core stayed cold, my feet got sweaty, and the dampness made my toes icy by midnight. Moving it to the core changed everything, it’s like a central heating unit you take to bed.
This proactive approach is what separates a list of essential tent accessories from the ones you actually use.
What About Heating a Tent?
Internal heaters like propane buddy heaters are risky. They consume oxygen and produce copious water vapor, the exact moisture you’re trying to avoid. They are a last-resort option for warming a vestibule briefly, never for use while sleeping in an enclosed space.
The safe, traditional method is a wood-burning tent stove inside a specially designed hot tent. These canvas tents with stove jacks are heavy but transform winter camping. The stove provides dry radiant heat and can even be used for melting snow. For backpackers, there are lightweight hot tents and compact tent heating stoves made of titanium.
If you’re not using a stove, your warmth comes from your sleep system and site management alone. This makes choosing a storm-proof tent that can handle the conditions without extra heat even more critical.
Frequently Asked Questions
Can you use a regular sleeping bag in winter with extra blankets?
You can, but it’s inefficient and risky. Blankets compress underneath you, providing little ground insulation. They also shift, creating cold gaps. A properly rated winter bag is engineered with structured baffles to prevent down shift and has a robust hood. It is a system, not just fabric.
How do you go to the bathroom in the middle of a freezing night?
Have a dedicated “pee bottle” (clearly marked, wide-mouth Nalgene) inside the tent vestibule. Getting out of your bag and the tent causes massive heat loss. This method keeps you under shelter. For solid waste, go outside quickly; have your boots and jacket ready right by the door.
My sleeping bag says it’s rated for -20°F. Why am I still cold?
The rating is likely a “Limit” rating, not “Comfort.” You are also probably losing heat through your pad (low R-Value), are wearing damp clothing, or have condensation wetting the bag’s interior. The bag rating is one variable in a three-variable equation.
Is a cot warmer than a sleeping pad in winter?
No. A cot elevates you into the coldest air layer of the tent, with convective air flow underneath you cooling you from all sides. A high-R-value pad on the ground is always warmer in winter conditions.
How important is tent color for warmth?
Marginally. A dark-colored tent will absorb slightly more solar heat during the day, warming the interior. At night, it makes no difference. Focus on fabric strength, design, and venting over color.
The Bottom Line
Staying warm in a winter tent is a deliberate practice, not a product purchase. It starts with a four-season shelter like a storm-resistant tent and a sleep system anchored by a high-R-value pad. Your campsite must be chosen and prepared to defeat wind and manage snow. Your nightly ritual must ruthlessly eliminate moisture, from your clothes, your breath, and the air inside your tent.
The gear is the toolbox. The knowledge, the why behind the R-Value, the physics of the cold air sink, the discipline to change your socks, is the skill that uses it. Master both, and a snowy night in the mountains becomes a profoundly quiet, comfortable experience, not a test of endurance.
